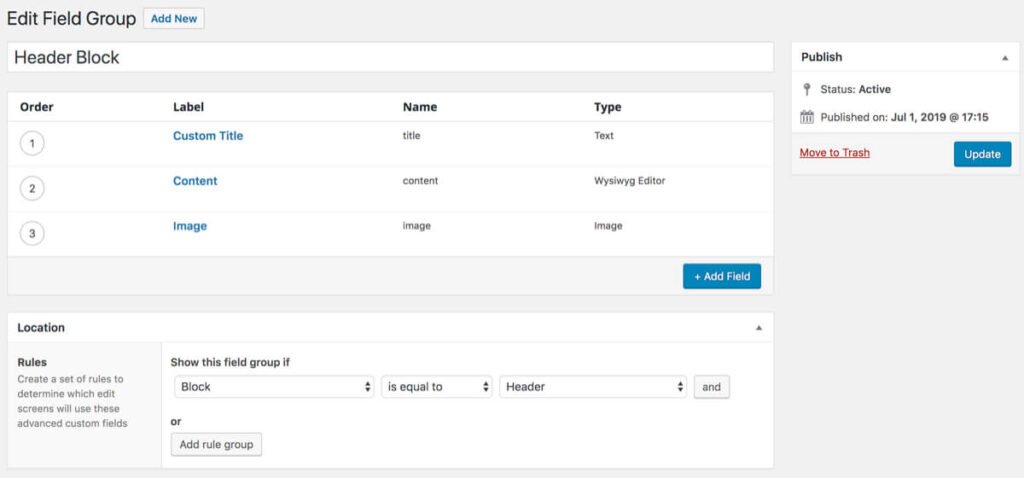
Learn how to custom build header block in WordPress using the Gutenberg editor. This comprehensive guide covers everything from setting up your development environment to registering and customizing your header block.
Creating custom header blocks allows developers to design and implement unique content elements for the Gutenberg editor. One essential block you might want to create is a header block, which can be reused across different pages and posts. In this guide, we will walk you through the process.
Table of Contents
Introduction
Header blocks are crucial for establishing a consistent look and feel across your wordpress using website development. They can include elements like logos, navigation menus, and other important information. By building a custom header block, you ensure that your headers are easily customizable and maintainable through the WordPress block editor.
Prerequisites
Before you start, ensure you have the following:
- A WordPress development environment (such as Local by Flywheel, XAMPP, or similar).
- Basic knowledge of HTML, CSS, JavaScript, and PHP.
- Familiarity with the WordPress block editor (Gutenberg) and Advanced Custom Fields (ACF).
Setting Up Your Development Environment
Ensure your WordPress installation is up and running. Navigate to your theme or plugin directory where you plan to create the custom header block. For this example, we’ll assume you are working within a theme.
Creating the Block Files

block.json
First, create a directory for your block, for example, /blocks/header/. Inside this directory, create a block.json file to define your block’s metadata.
jsonCopy code{
    "name": "custom/header",
    "title": "Custom Header",
    "description": "A custom header block for your site",
    "category": "layout",
    "icon": "heading",
    "apiVersion": 2,
    "keywords": ["header", "custom", "block"],
    "acf": {
        "mode": "preview",
        "renderTemplate": "render.php"
    },
    "supports": {
        "align": false,
        "anchor": false,
        "alignContent": false,
        "color": {
            "text": false,
            "background": true,
            "link": false
        },
        "alignText": false,
        "fullHeight": false
    },
    "attributes": {
        "backgroundColor": {
            "type": "string",
            "default": "primary"
        }
    },
    "styles": [
        { "name": "default", "label": "Default", "isDefault": true },
        { "name": "dark", "label": "Dark" },
        { "name": "light", "label": "Light" }
    ]
}
style.css
Next, create a style.css file to define the block’s styles.
cssCopy code.header-block {
    padding: 20px;
    text-align: center;
}
.header-block .logo {
    max-width: 100px;
}
.header-block .navigation {
    margin-top: 10px;
}
render.php
Create a render.php file to define how the block should be rendered.
phpCopy code<?php
function render_custom_header_block($block) {
    $background_color = isset($block['attributes']['backgroundColor']) ? $block['attributes']['backgroundColor'] : 'primary';
    ?>
    <div class="header-block" style="background-color: <?php echo esc_attr($background_color); ?>;">
        <img src="<?php echo esc_url(get_template_directory_uri() . '/images/logo.png'); ?>" alt="Logo" class="logo">
        <nav class="navigation">
            <?php wp_nav_menu(array('theme_location' => 'header-menu')); ?>
        </nav>
    </div>
    <?php
}
Registering the Block
In your theme’s functions.php file or a custom plugin, register the block.
phpCopy codefunction register_custom_header_block() {
    register_block_type(get_template_directory() . '/blocks/header/block.json');
}
add_action('init', 'register_custom_header_block');
Adding Block Attributes
In the block.json file, we defined an attribute backgroundColor. You can add more attributes based on your requirements , such as text alignment, custom class names, etc.
Customizing the Block
Customize the block by modifying the CSS and PHP files to match your design requirements. You can add more styles in style.css and additional HTML/PHP in render.php to enhance the functionality and appearance of your block.
If it was just a header, I would probably manually build it in the CPT archive template file. But if I needed the flexibility to add lots of blocks to the top of the CPT archive, I’d use this approach: https://noomaan.com/wordpress-gutenberg-block-widget-areas/
Testing Your Header Block
After setting up and registering the block, head over to the WordPress block editor. Add your new block to a page or post and test its functionality. Ensure that it appears as expected and that all attributes and styles are applied correctly.
Conclusion
Building a custom header block in WordPress allows you to create reusable and easily customizable header elements for your website. By following this guide, you can leverage the power of the Gutenberg block editor and ACF to create a functional and visually appealing block. Experiment with different attributes and styles to make your header block unique and tailored to your website’s needs.

